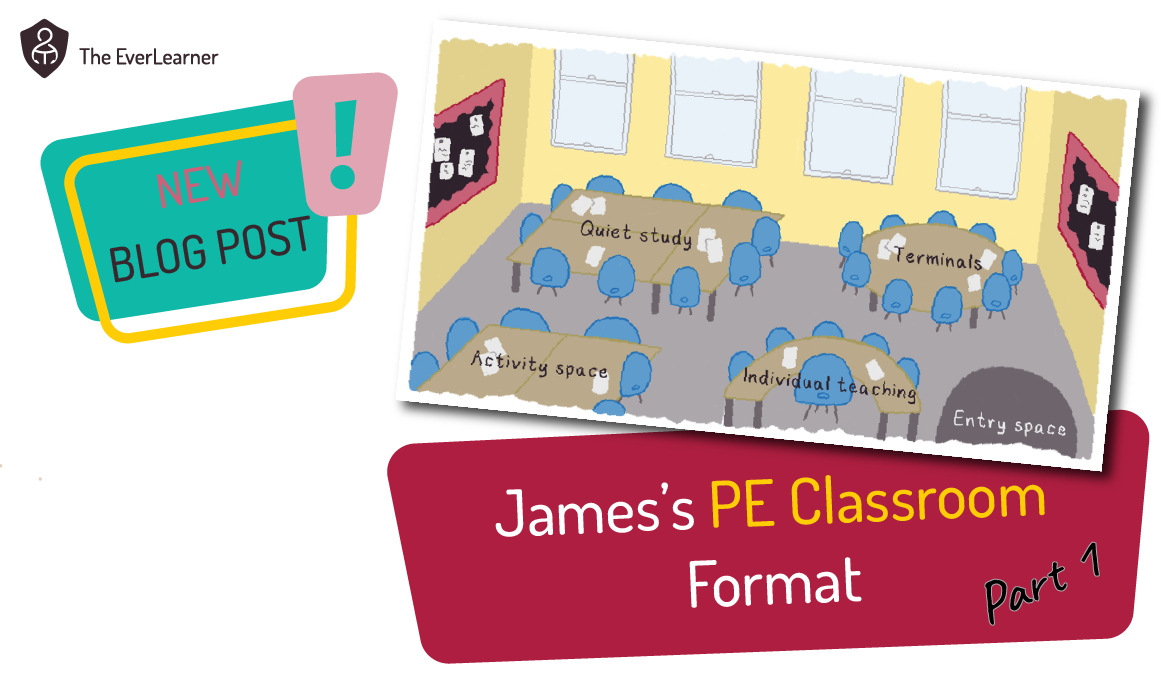
%20Text%20(Violet).png)
Like every other (PE) teacher, I have rules by which I run my classrooms. In this post, I want to share ten rules which I stick to in all of my PE classroom sessions. Take a read and let me know what you think.
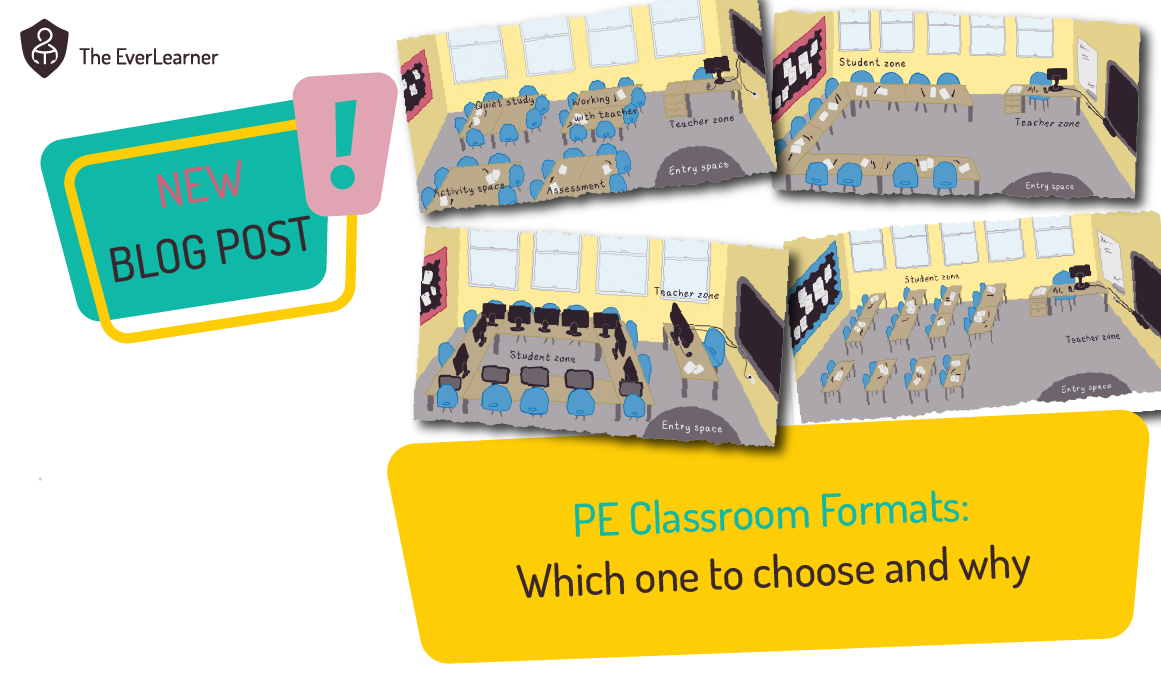
In Part 1:
- Straight lines.
- No arrows unless we are drawing vectors.
- Label, label, label!
- Perform like it before we write like it.
- Every example follows the E-I-O model.
In Part 2 (released Wednesday 23rd Jan 2024):
- I’m not your nanny.
- Never be silent.
- Errors are good.
- There is (almost) zero wriggle room.
- Yet!
James’s rule 1: Straight lines
I am an absolute stickler for this. When students are drawing and illustrating, they use straight lines. Let’s take the drawing of a graph of heart rate or a vector diagram of a sprinter. Students must –and I mean must– use straight lines for axes, vectors, bars, etc. Leading up to the production of straight lines, we may well do some sketching freehand, possibly even on mini-whiteboards, but our answers, notes and any form of “product” will be correctly illustrated. This is our standard and I insist on students meeting it.
Take a look at these examples:
Furthermore, I have a few associated mini-rules in relation to straight lines:
- Label lines (see rule 3) must be drawn horizontally and vertically only and must not feature arrowheads (see rule 2 and 3).
- Students must carry a pencil, ruler and sharpener.
- Students only draw in pencil.
You might find that a bit much but I am setting a standard with students and I insist they meet it. Established with good grace, positivity and even humour at times, this standard conveys a crucial message to my students: I care and I believe that you can do it “right”.
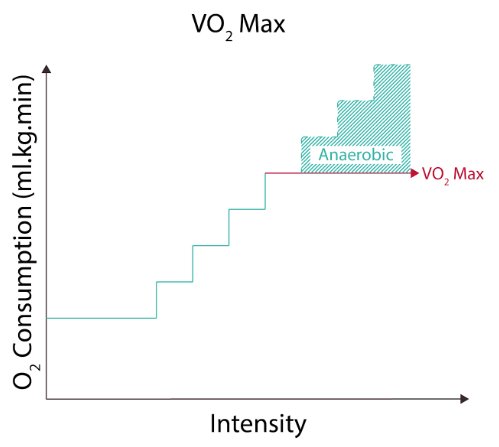
James’s rule 2: No arrows unless we are drawing vectors
In the study of physical education, an ⟶ is a vector. It is only a vector. It is not a pointer for an image or a general item. It is a vector, specifically. Therefore, when I label things, I do it like this:
Or this…
However, when I provide a vector illustration, I use arrows (vectors) like in the image below. Vectors have magnitude (length) and direction (they are pointing) and need arrows:
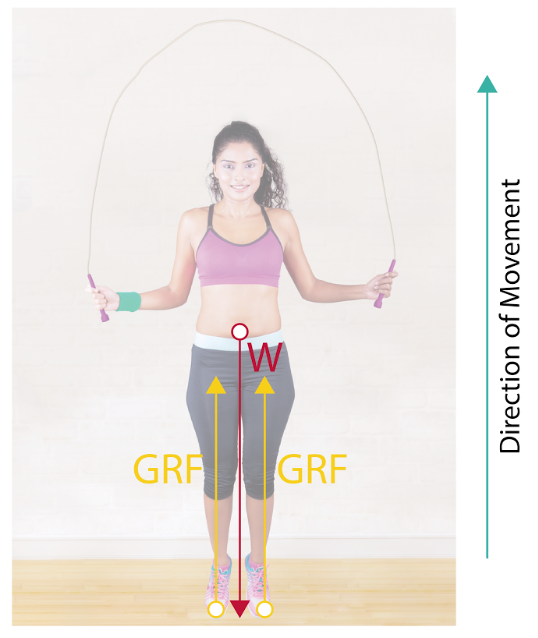
I will take labelling further in point three but this is a standard I ask you to consider applying with your students.
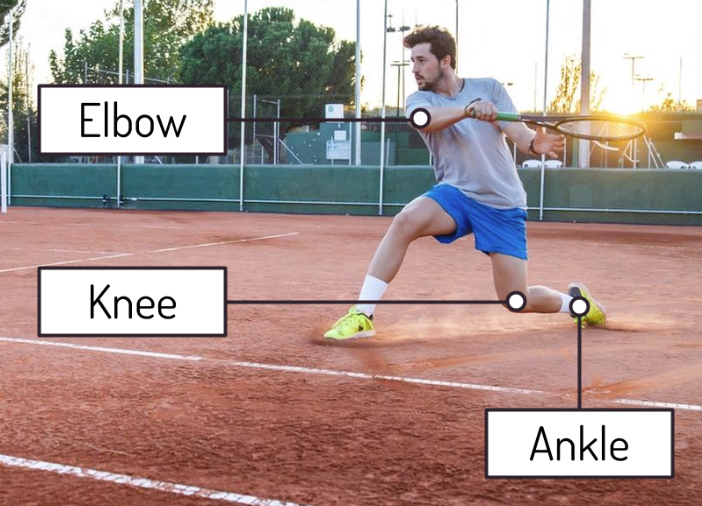
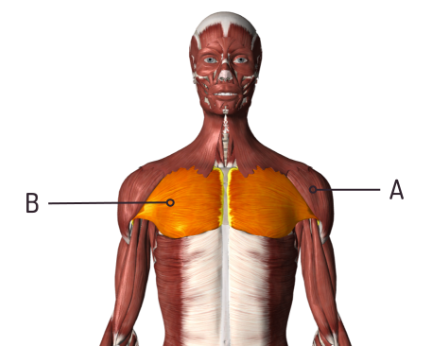
James’s rule 3: Label, label label!
I use labelling all the time with PE students but I have a couple of demands of my students. Take a look again at this image:
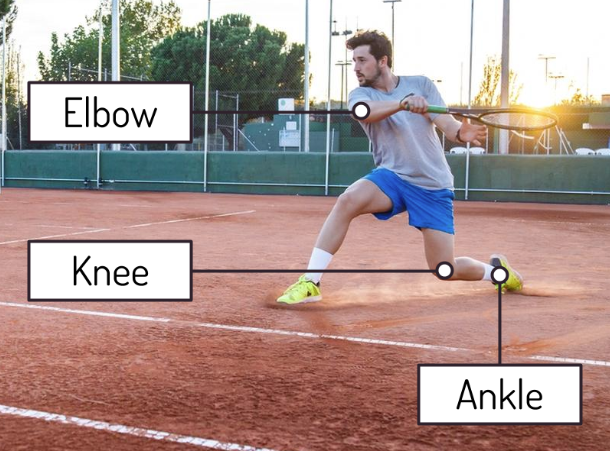
And at this one:
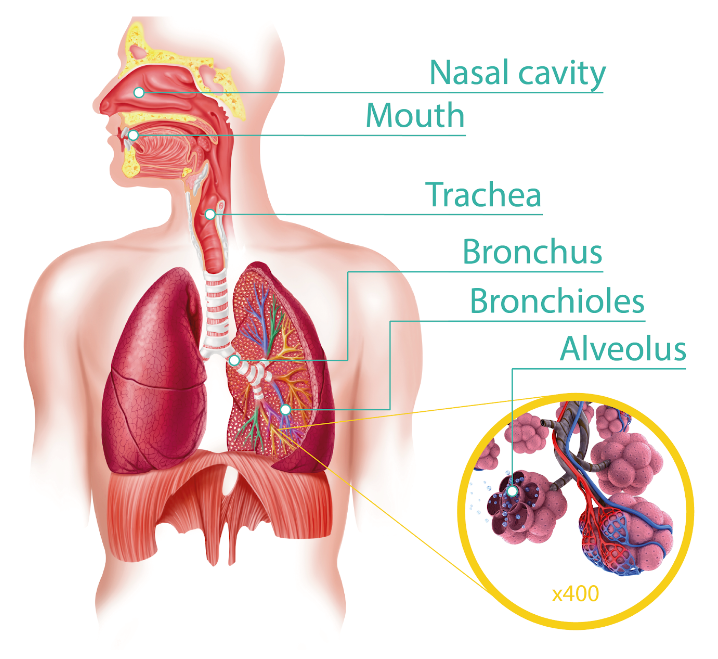
Or even at this one, from GCSE physics (which I occasionally do revision sessions for people I know) this time:
All of these images retain these rules:
- Labels are not arrows/vectors (see above).
- Labels are either vertical or horizontal. There are sometimes occasions when I will use a label at 45 degrees but this is in a specific scenario.
- Label lines do not cross.
You may also notice that I try to get the spacing between labels as consistent as possible, although this wasn’t possible between the trachea and the bronchi on the respiratory image.
I encourage you to apply these standards both with your own teacher-produced resources and when your students label images.
James’s rule 4: Perform like it before we write like it.
This is a big one and one that you may need to link out to other blog posts of mine such as my writing on question techniques:
- "Questioning techniques in the PE classroom (Part 1)"
- "Questioning techniques in the PE classroom (Part 2)"
- "Questioning techniques in the PE classroom (Part 3)"
As well as my writing on the skill of evaluation specifically in "My three favourite evaluation activities in PE lessons".
What I make a rule about is intended to prevent this (typical, I think) classroom practice:
- Teach students content including required skills.
- Do a worksheet or equivalent.
- Answer an exam question or equivalent that requires a specific skill as well as the content.
For example, imagine that I am teaching about hosting major events such as the Olympics and World Cups and imagine that a major target of this lesson is the “Evaluate” skill. The model above is likely to include:
- Slides containing positives and negatives of hosting
- A worksheet that involves some kind of evaluation
- An “Evaluate” exam question
My rule is that this structure breaks the rule “perform it before you write it!”. The students have not evaluated in the model above, in my opinion.
Rather, I would structure my lesson something along the lines of this:
You might be wondering what on earth I am talking about. Well, each of these activities is specifically designed to draw out the skill of –in this case– evaluating. Please, click on the relevant links above for details of each method but I want to make a critical point:
In other words:
Students need to perform like it before they write like it!
James’s rule 5: Every example follows the E-I-O model.
Once again, much of my writing on this theme is out there already and I have written entire blog posts introducing the E-I-O model previously.
In short, the E-I-O model is as follows:
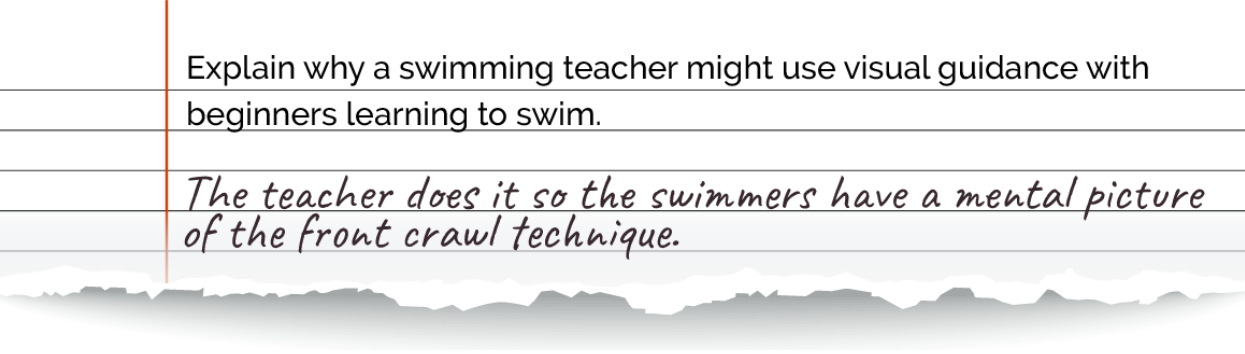
If we pose a question such as “Explain why a swimming teacher might use visual guidance with beginners learning to swim”, the answer might come back to us as “The teacher does it so the swimmers have a mental picture of the front crawl technique.”
If we place this into the E-I-O model, we get this:
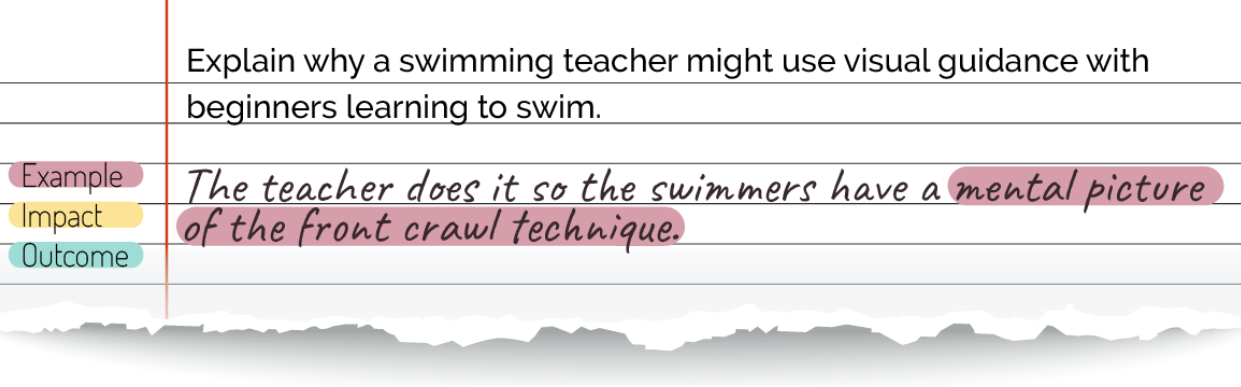
In other words, the student has made the example (E) only and has not gone on to explain the impact (I) and outcome (O) of this process. Let’s add the impact (I):
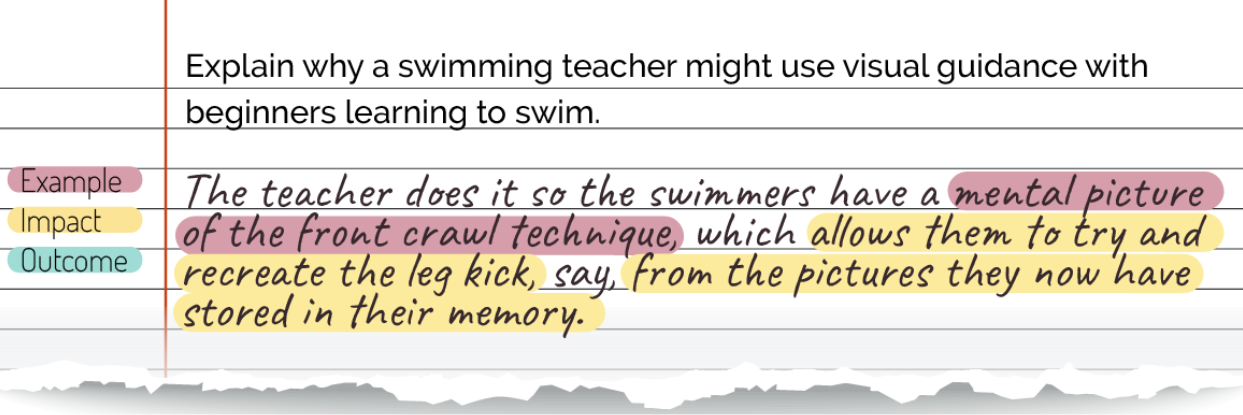
So, the beginner swimmer is now impacted by the visual guidance in relation to their front crawl but, crucially, we can take this further by adding an outcome (O):
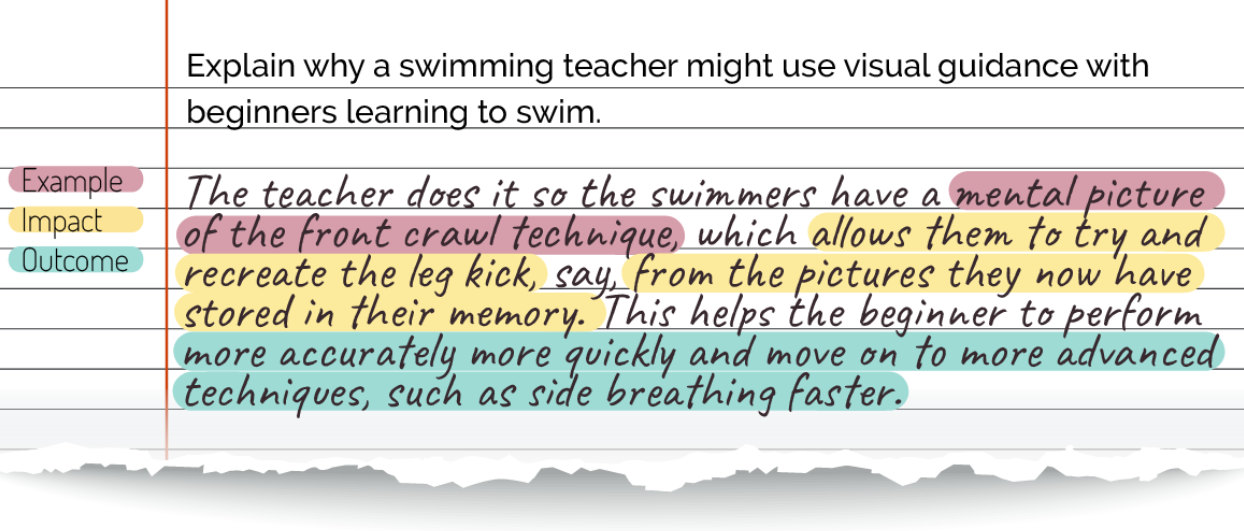
In this final response, the idea that the student has begun with has been fully explored and impact and outcome have been included.
My reason for including this process in the 10 rules of my classroom is because it needs a standard to be set. I set the standard as the teacher, then I model it and expect it from my students. This is how we get the job done. It is also how we make students truly engage with the applied nature of our subject.
Conclusion
I hope these first five rules of my PE classroom are interesting to you. I love writing about them and I hope they may have an impact on somebody. However, I also want to mention one rule that I will never have in my classroom and it is this:
🚫 Zero tolerance 🚫
All of my rules tend to be applied almost all of the time. However, there is always the possibility or an occasion for the exception. I want to state clearly that (literally) the worst-performing teachers and school managers I have worked with have stood on a zero-tolerance ticket. A colleague who talks of zero tolerance is doing so because they lack solutions to their challenges or, perhaps, because those they have attempted have been prevented by a school’s culture. Zero tolerance has no space in a school setting. In other words, I have zero tolerance for zero tolerance. Agh!!! I just broke my own rule! I told you there would always be an exception, didn’t I!!??
Thanks for reading.
James