Biomechanics - Five Key Facts that Underpin Successful PE Teaching (Part 1)
➡️ Are you worried about teaching biomechanical principles at GCSE and/or A-level?
➡️ Are you not entirely sure what a force or a vector is?
➡️ Do you wish that biomechanics had remained a distant university memory and nothing more?
If you are a PE teacher and you answered yes to any of those questions, this blog post is for you. My intention is to guide you through five core principles of biomechanics and to simplify them as much as possible without losing any understanding at all. Let’s get started…
Key Fact 1: A force is a push or a pull that tends to change the state of motion of a body.
Let’s keep this simple: forces cause movement. But, importantly, forces also keep an object still. Therefore, forces are the basis of all movement and stillness in sport.
If a force is applied to an object—unless there is an equal and opposite force applied—the object will accelerate in the direction of the newly applied force and will do so at a rate that is proportional to the size (magnitude) of the force.
This is summarised with this equation:

where...
F refers to a force
m refers to mass
a refers to acceleration
So, let’s take the example of a volleyball spike. The volleyball has a constant mass. In other words, the mass of the volleyball will not change during the shot. This means that the m part of the equation cannot change and can be neglected. This then leaves us with this scenario:
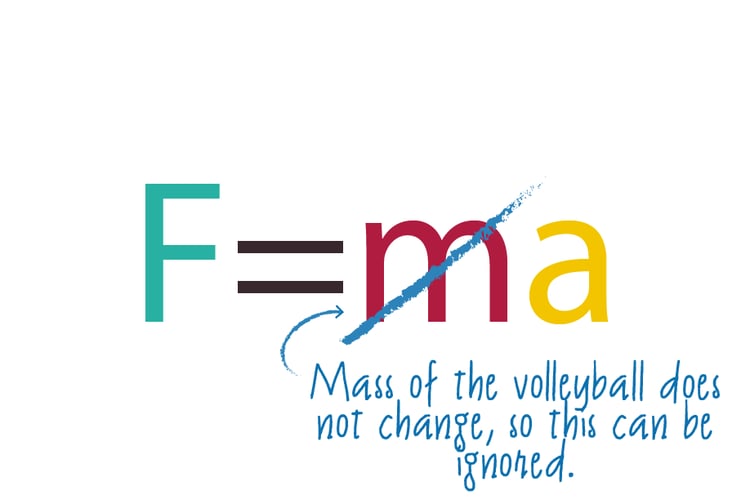
...so, essentially, F ∝ a. The logic of this is quite straightforward: if the volleyball player applies more force to the ball when spiking, the ball will accelerate more and the shot is harder to block. Likewise, if the volleyball player applies less force to the ball, the acceleration will be less. Consider how this knowledge could be used in the following two scenarios:
- The spiker wants to reduce the time the ball is travelling through the air to decrease the chance of it being blocked.
- The spiker believes the spike will be blocked, so decides to tip the ball so that it just clears the blockers and lands behind them.
The answer to these scenarios—with a little nuance and technique added in—is that, in the first scenario, the player should apply more force to create a greater acceleration and, in the second scenario, apply less force to create a more subtle acceleration.
Key Fact 2: A vector can be used to visually represent a force.
A vector is a value that has both scale (magnitude) and direction. For this reason, a vector is represented by an arrow where the length of the arrow represents the scale of the force and the direction represents, well, the direction. Take a look at this example:
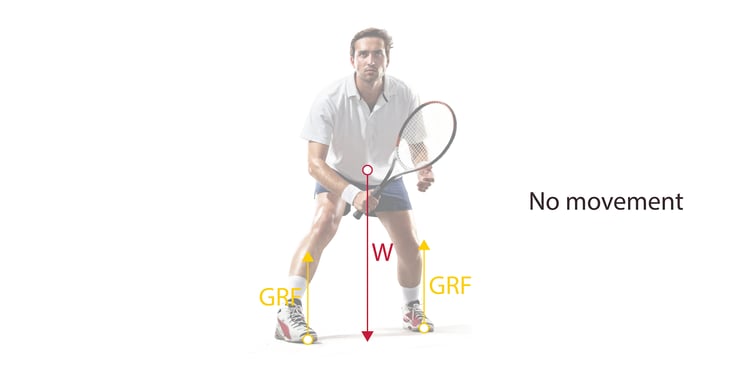
There are two vectors present in this image. The red weight vector has the following properties:
- It has its origin from the centre of mass of the body/object.
- It is acting vertically downwards towards the centre of the earth.
- Its length is quite long (roughly to the floor), meaning the weight force is quite large. Human beings are heavy bodies, of course.
The yellow ground reaction force (GRF) vectors have the following properties:
- The origins are from the contact points between each foot and the floor.
- They are acting vertically upwards in the opposite direction to the weight.
- Combined/added together, the GRFs are equal in magnitude to the weight force.
Whilst this is a very simple example, the principle here is the key one. If we know the origin, direction and scale of a force, we can illustrate it as a vector. Our examples are of vertical forces but the same applies for horizontal forces (I’ll cover this in part 2 of this blog).
Key Fact 3: A torque is a force that has been applied away from the centre of mass of an object.
So far, we have only talked about forces. A force is applied to or through the centre of mass of a body/object. However, forces can also be applied away from the centre of mass and this is known as a torque (it is also known as a moment). A torque has the tendency to create angular or circular motion in a body.
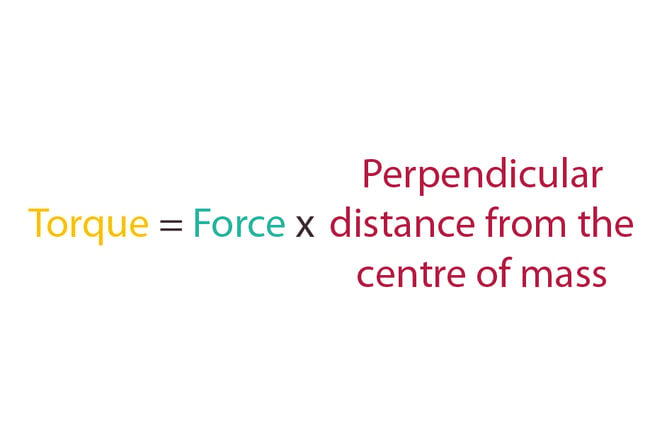
Take the example below:
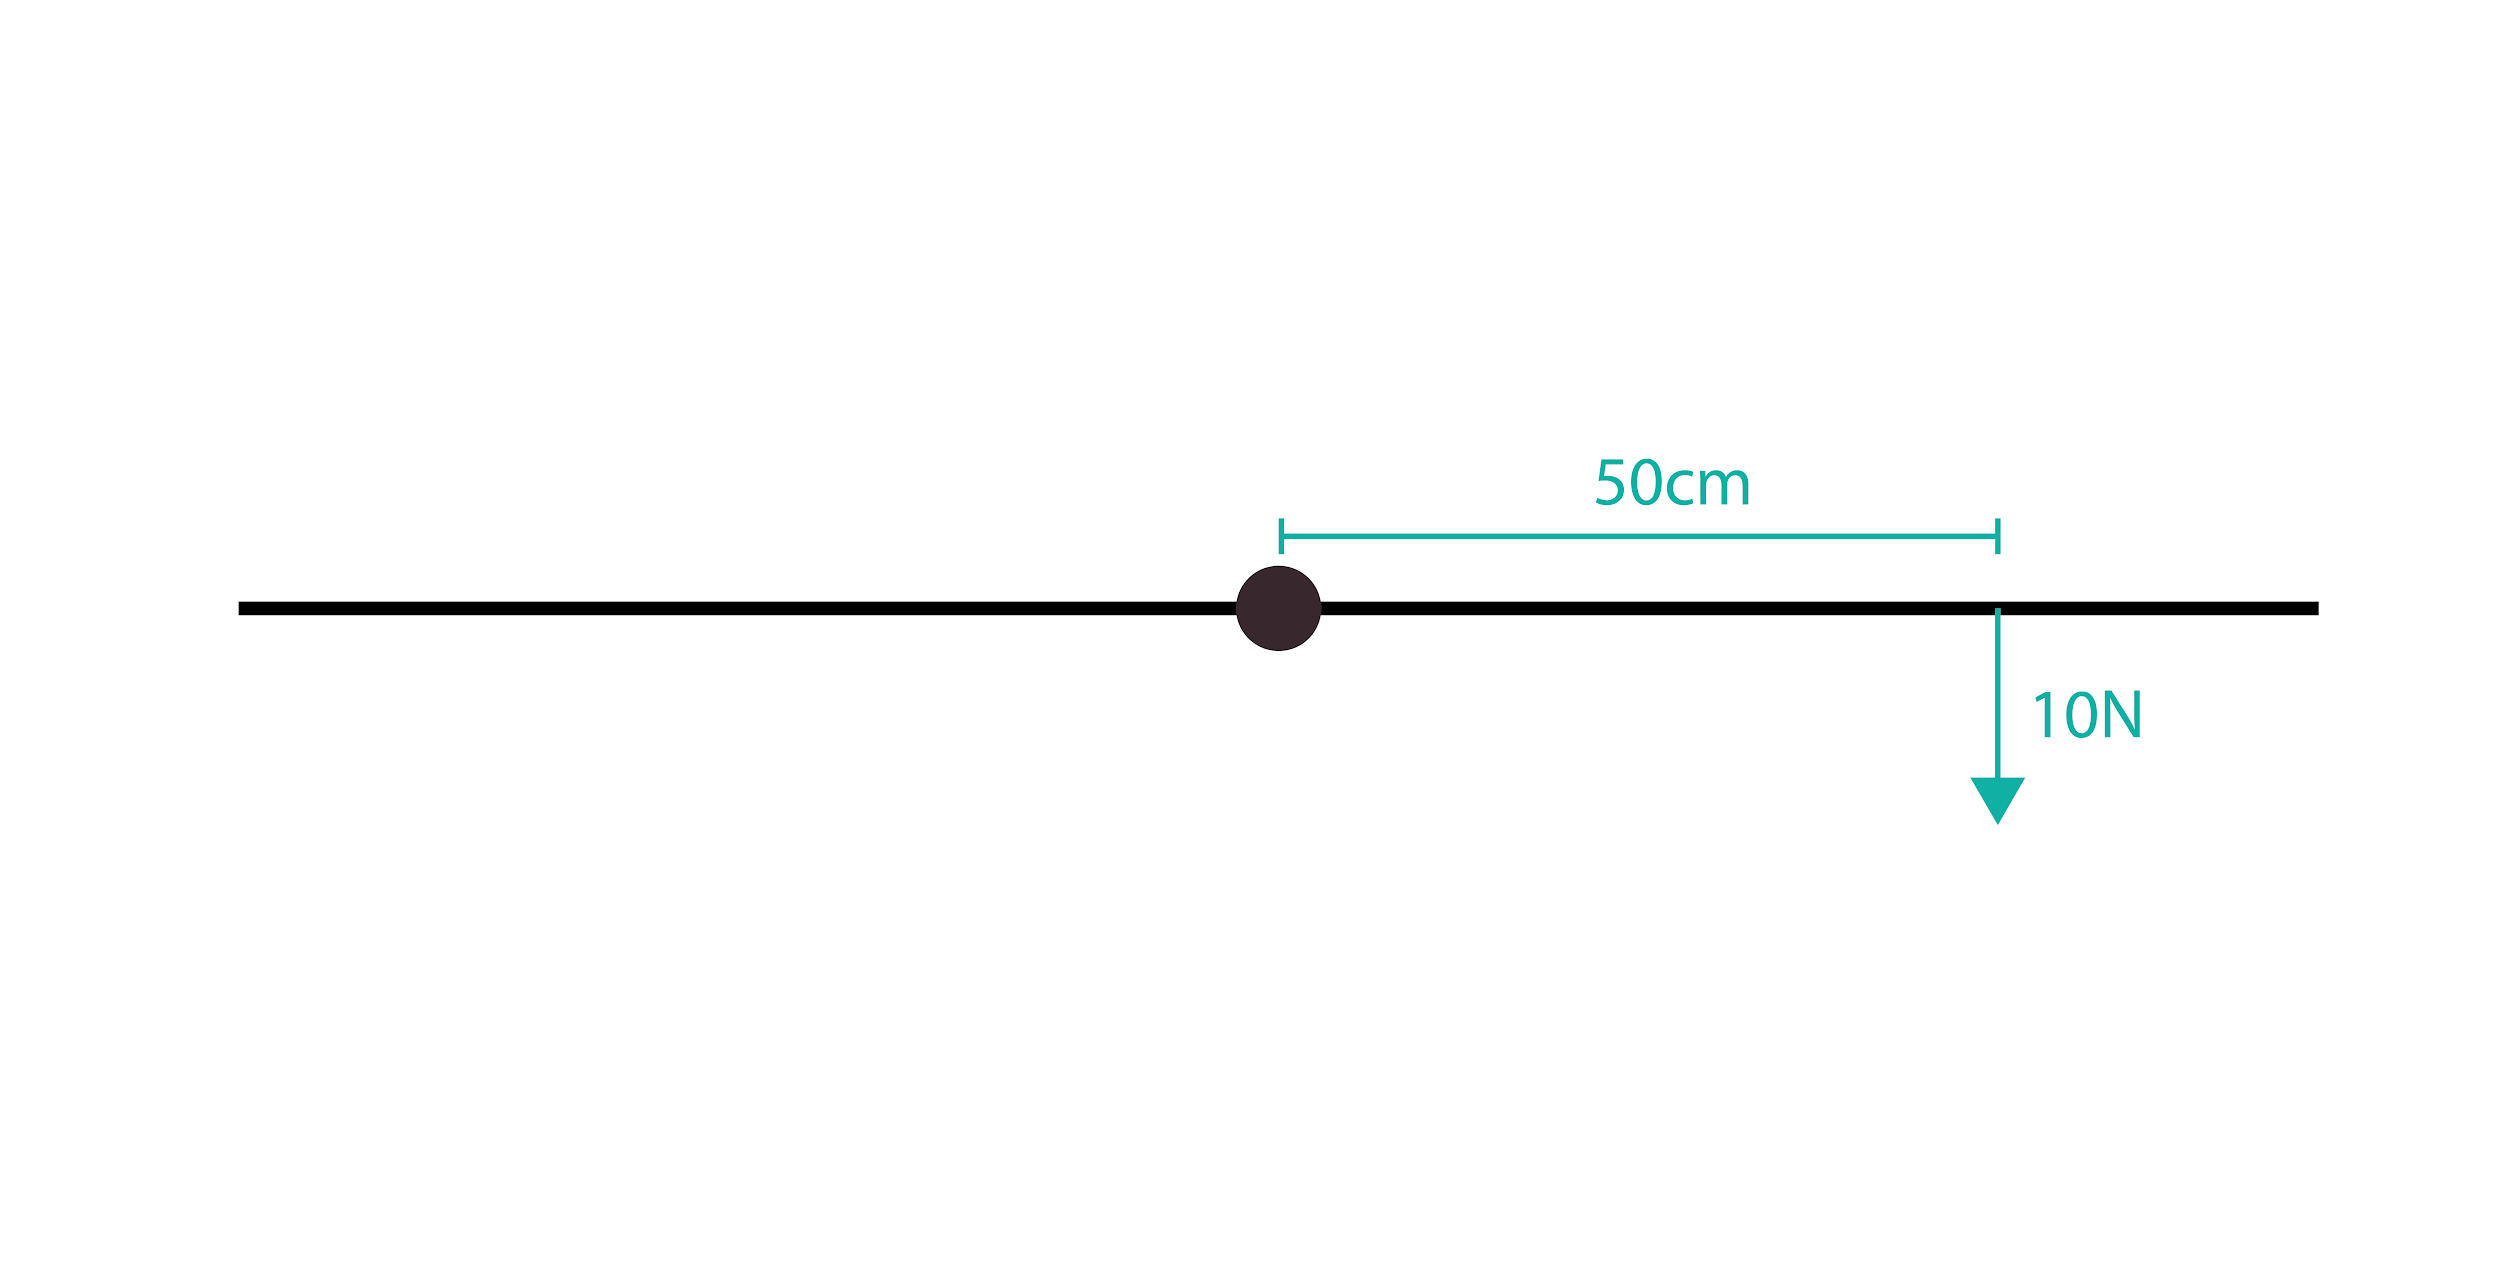 Considering that torque is measured in Newton-metres, can you calculate the torque acting on this body (lever)?
Your answer should be:
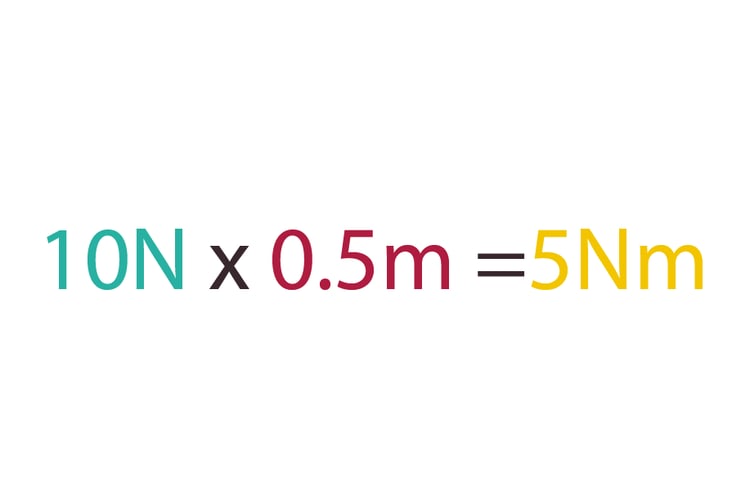
The body (lever) will accelerate in a clockwise direction at an angular acceleration proportional to the 5Nm torque acting.
Key Fact 4: Net force describes the total forces acting on a body.
Let’s return to our learning about vectors. Here is our tennis player, ready position example again:

You will notice that, in this image, there is a label of “No movement”. The reason for this is that there is zero net force. “Net” simply means total. The logic of this can be summarised in this image:
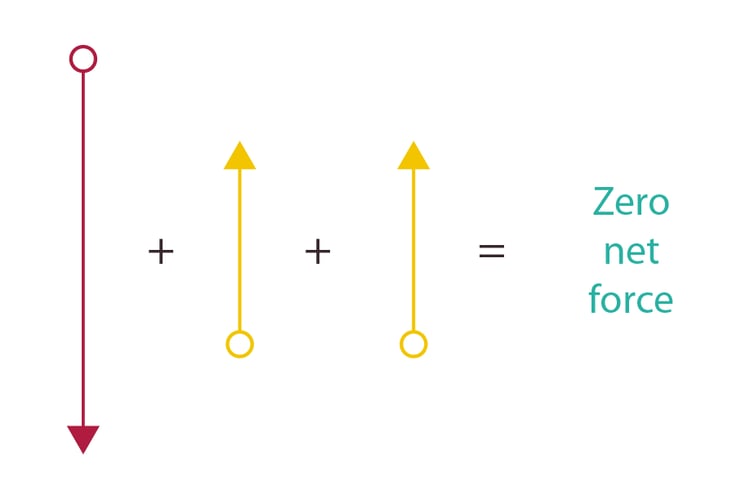 So, if the total (net) forces acting on a body cancel each other out, two types of movement are possible:
- The body will remain stationary.
- The body will remain in a state of constant velocity.
This also means that if there is a net force (meaning it’s not zero), two types of motion can occur:
- The body will accelerate.
- The body will decelerate.
Let’s look at an example:
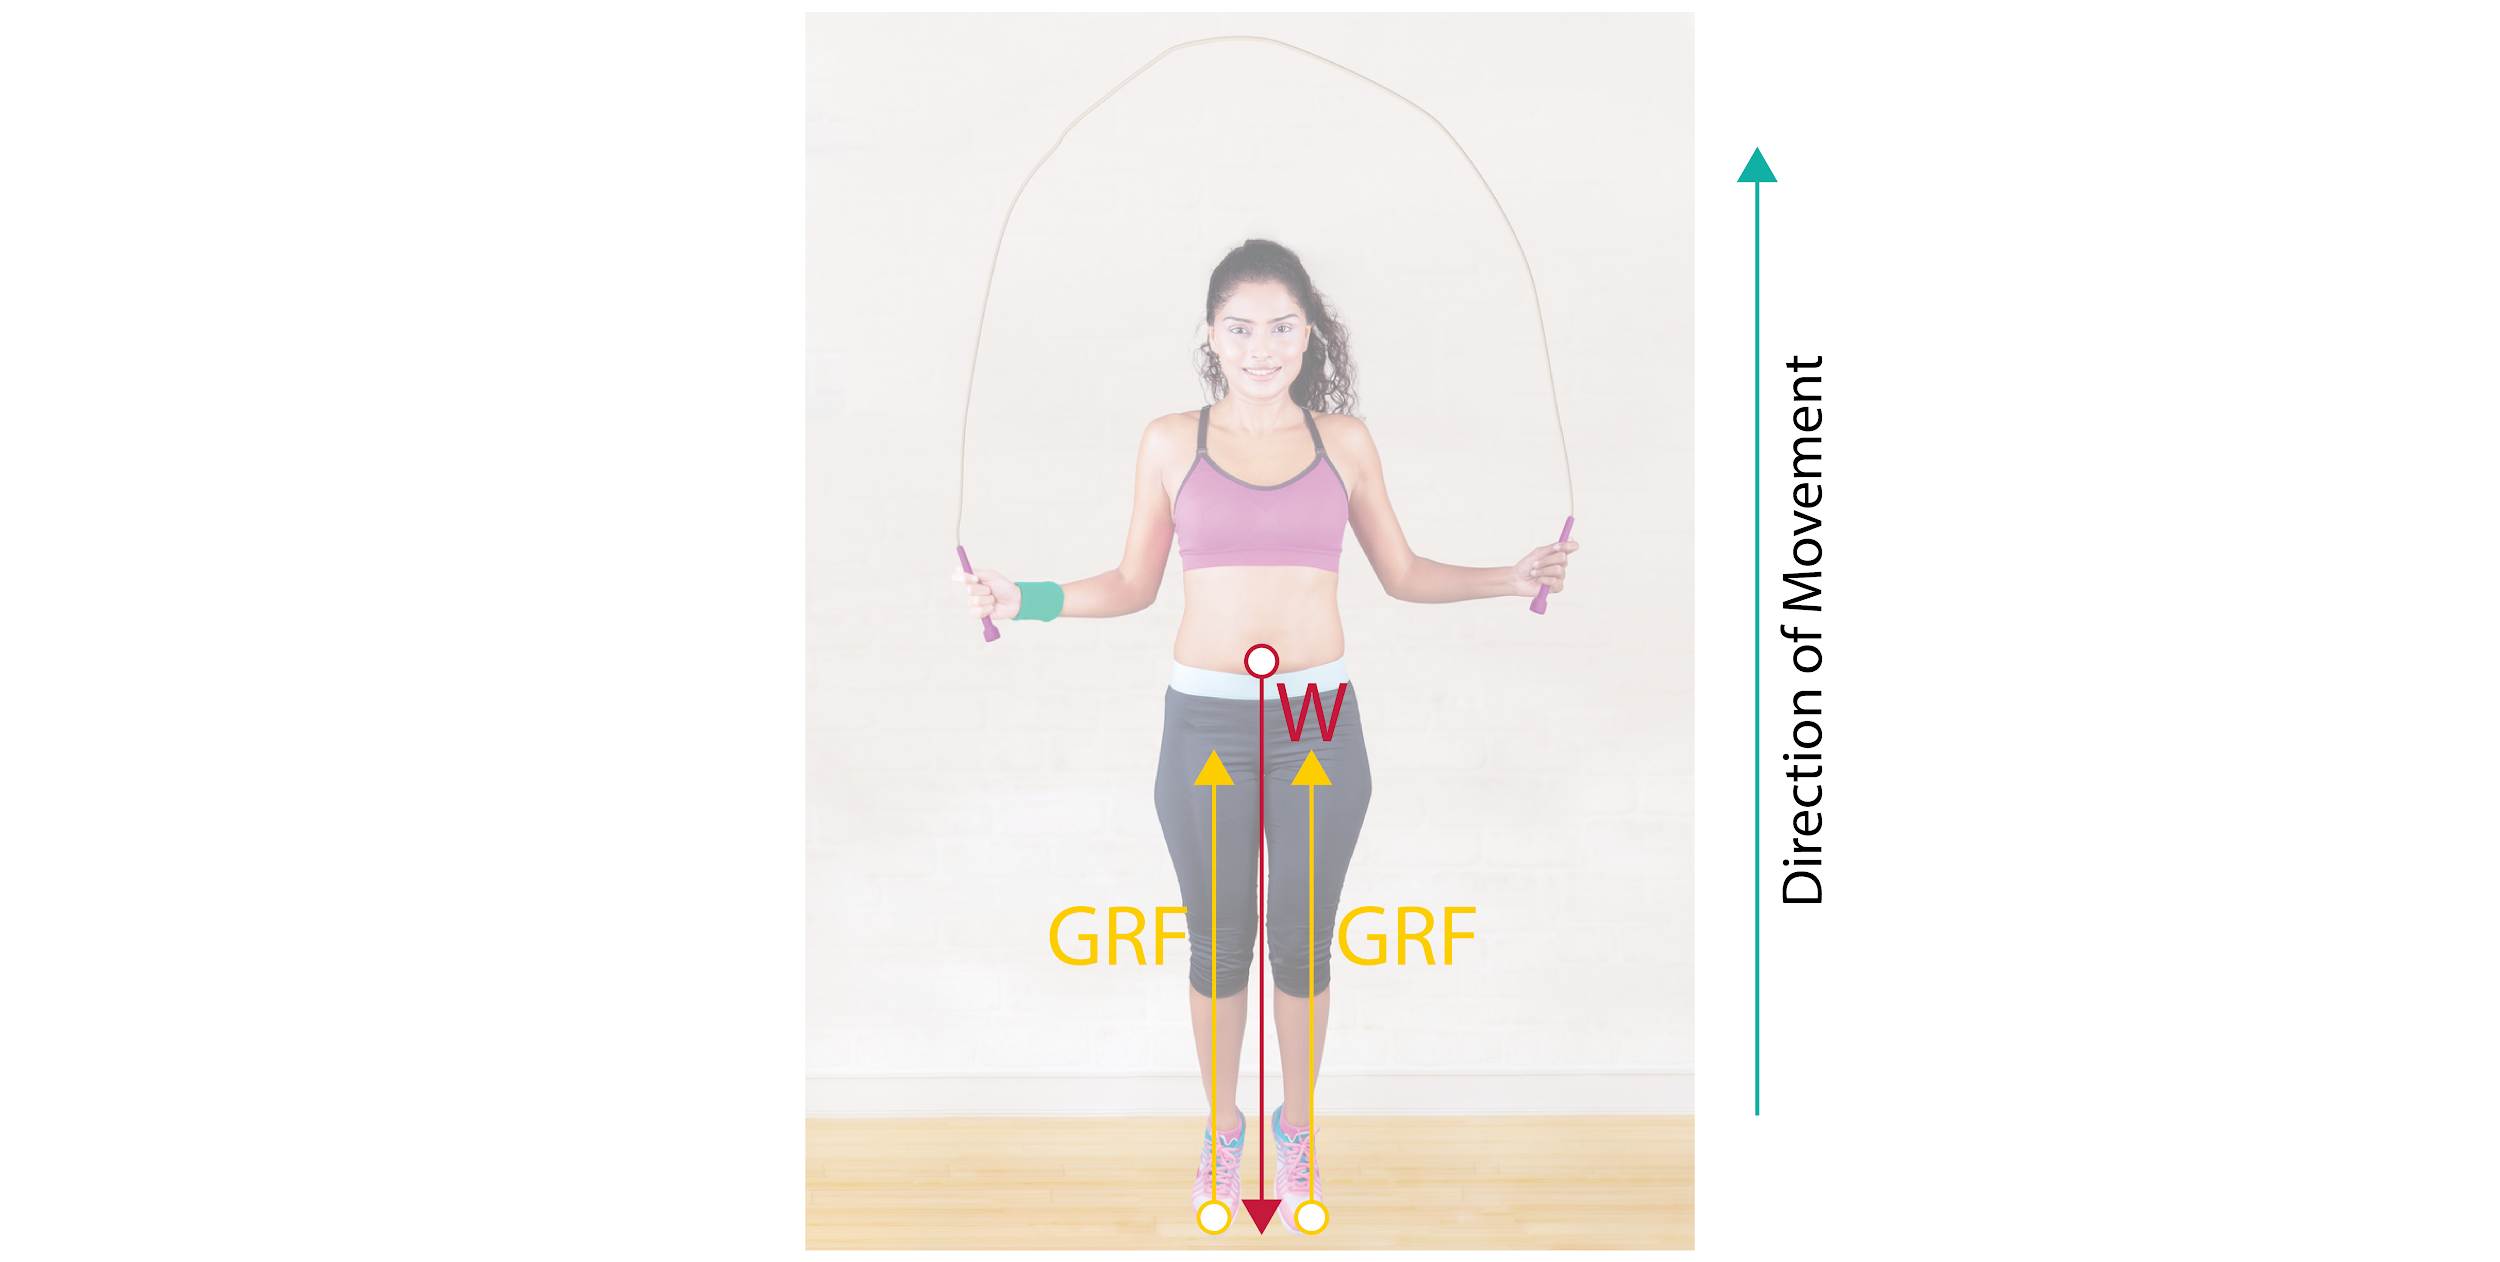
Here we can see that there is a net force. The net force is acting upwards and this will cause upwards acceleration proportional to the size of the net force acting. In other words, the skipper will jump.
Please also notice that the same principles apply about the origin, direction and length of the vectors.
Key Fact 5: Net torque describes the total torque acting on a body (lever).
Let’s return to our rotating body and assess this example:
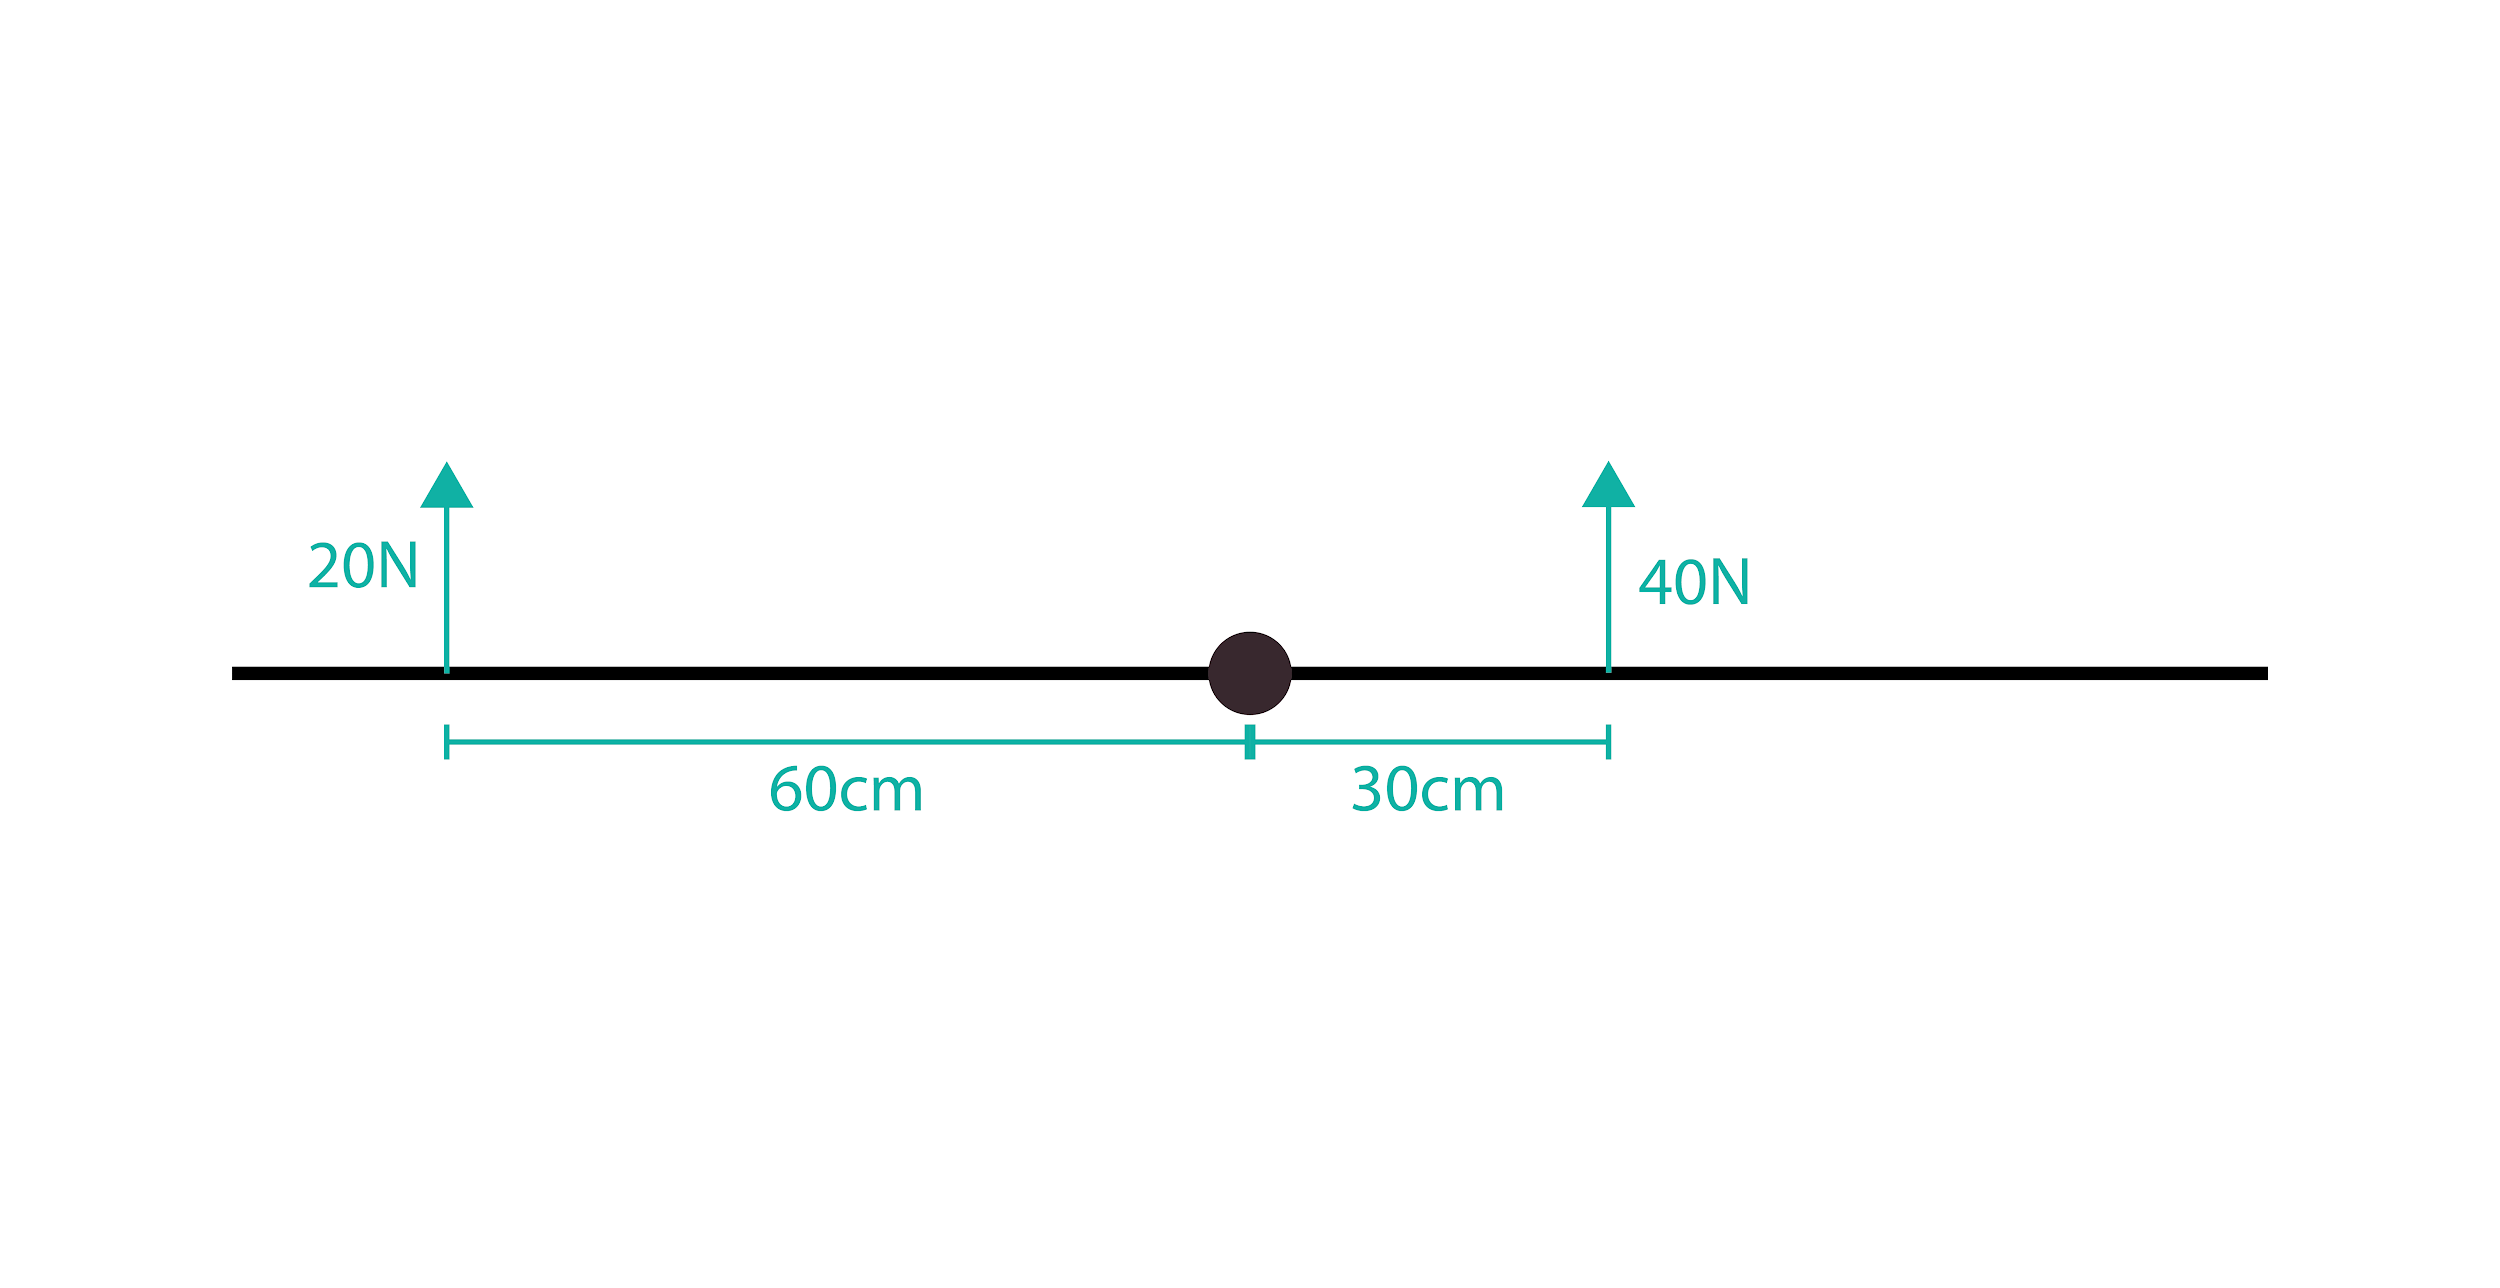
Here we have two torques acting. One clockwise torque and one counterclockwise torque. Take a moment (no pun intended) to calculate each torque and then determine the direction of motion. Does the body (lever) rotate clockwise or counterclockwise? What was your conclusion?
Here is the answer:
.png?width=2500&name=image7%20(1).png)
As we discovered earlier, “zero net torque/force” results in no change in motion. Therefore, this lever system is balanced and will remain stationary or moving with constant angular velocity. Understanding this principle helps us to understand how stillness is achieved by a trampolinist in a pike position or a skier in a downhill crouched position or even something as simple as a wall-sit.
Let’s take an example where angular motion does occur. What would be the nature of the movement in this example?
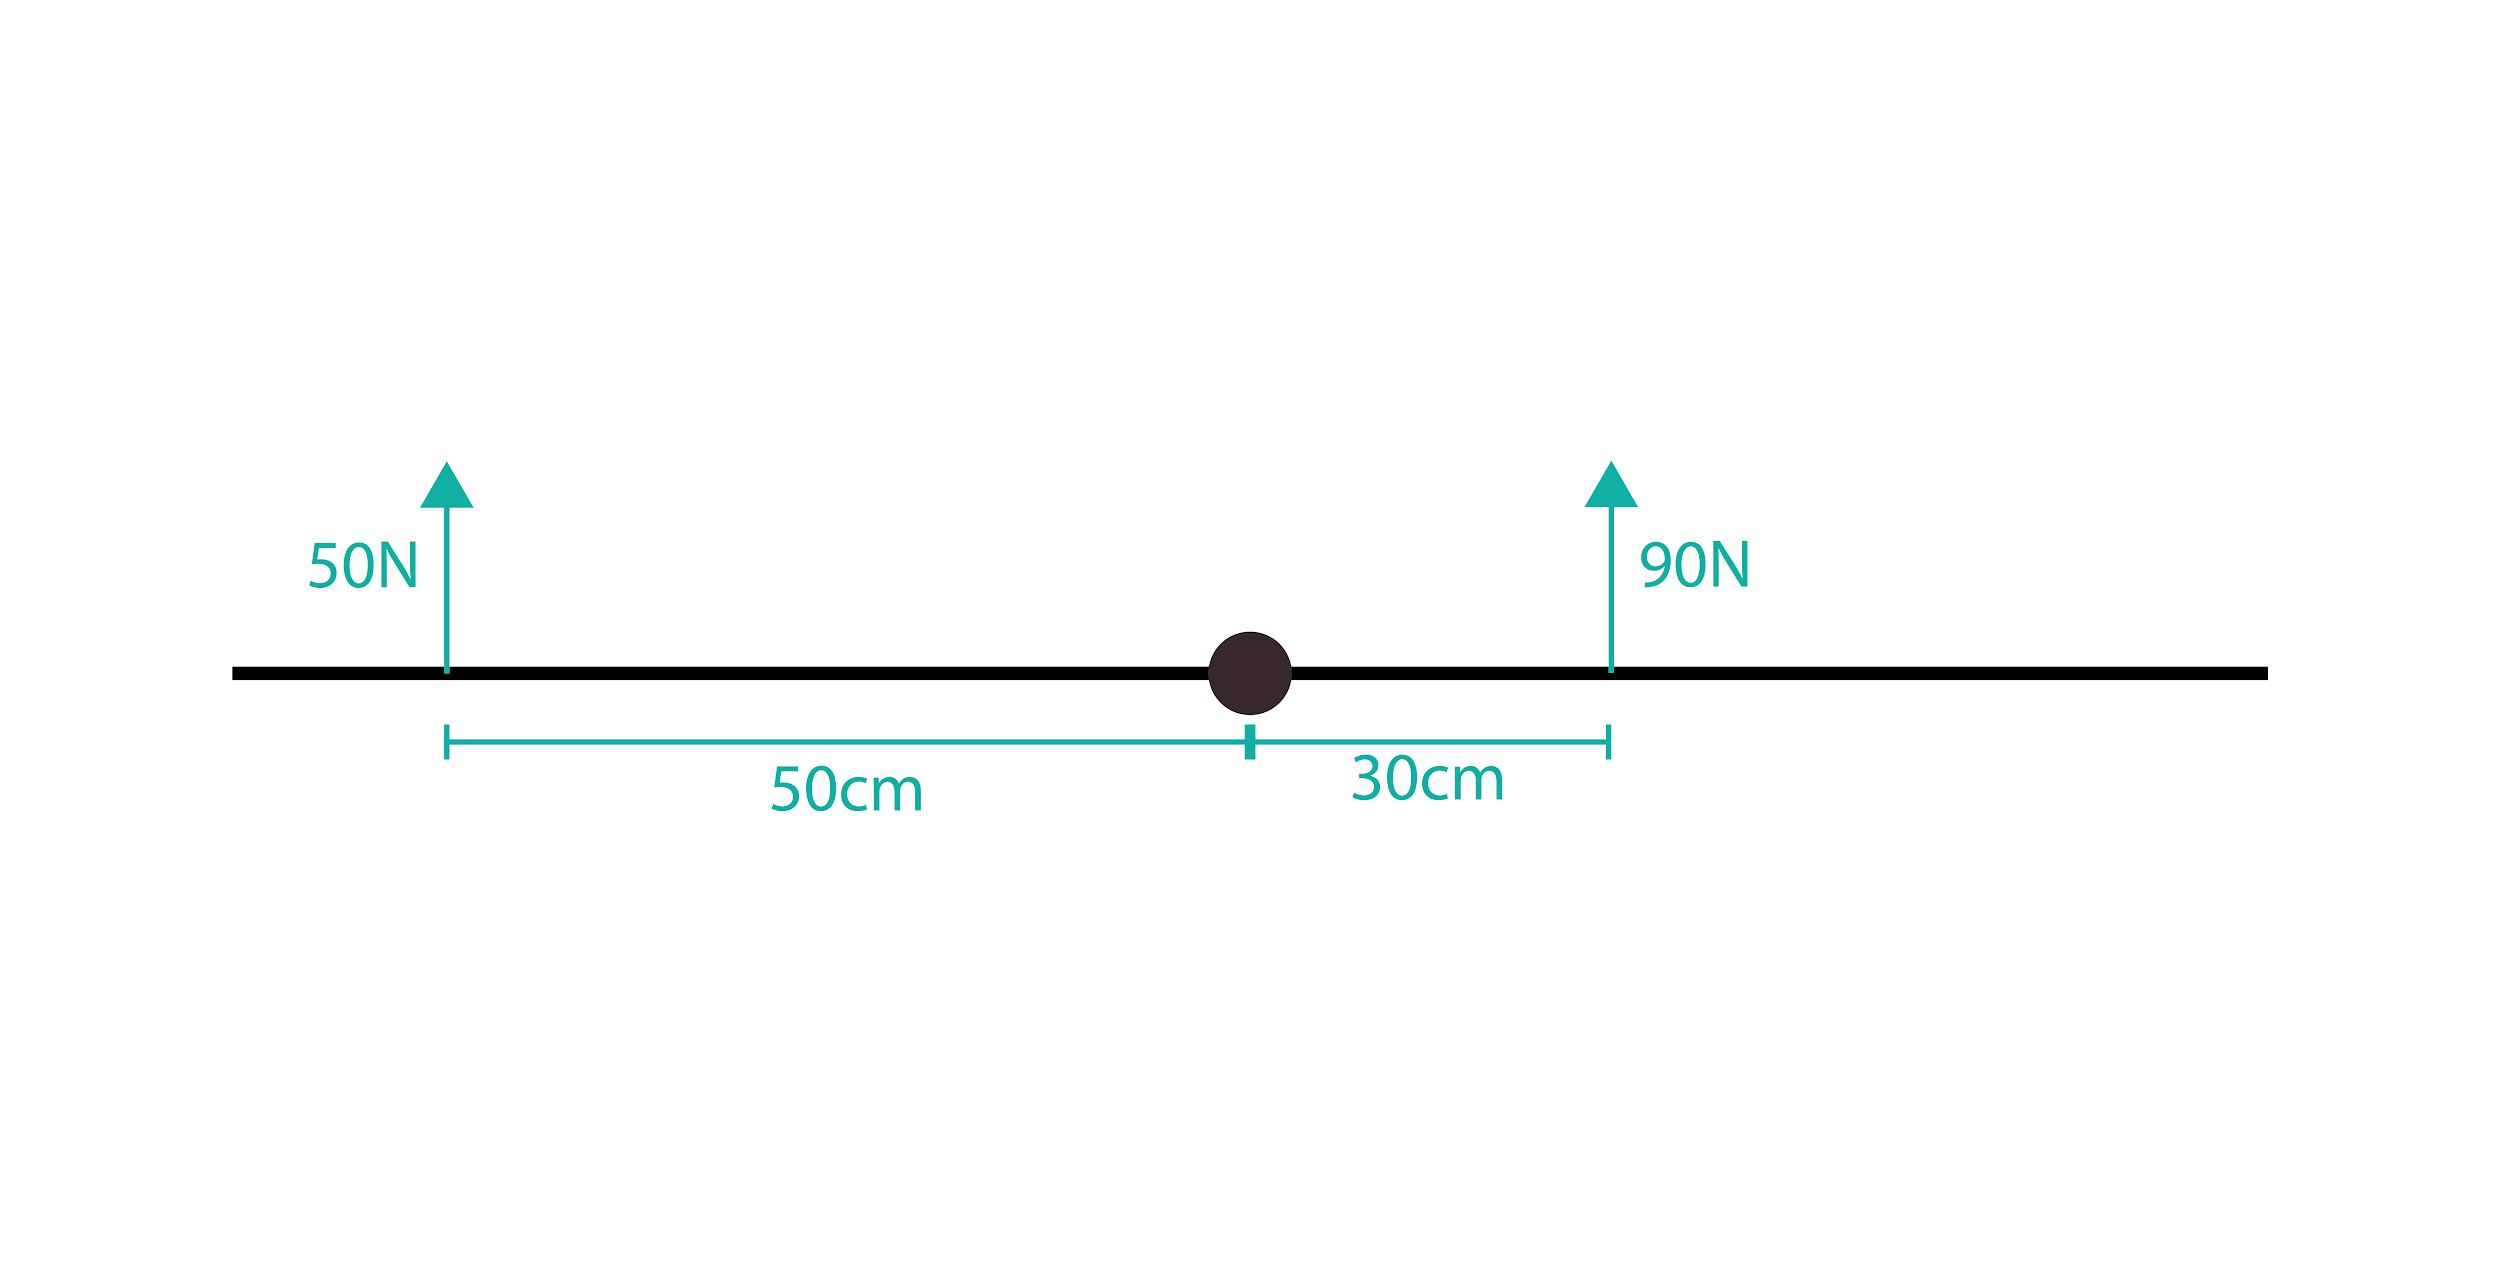 The answer can be revealed here:
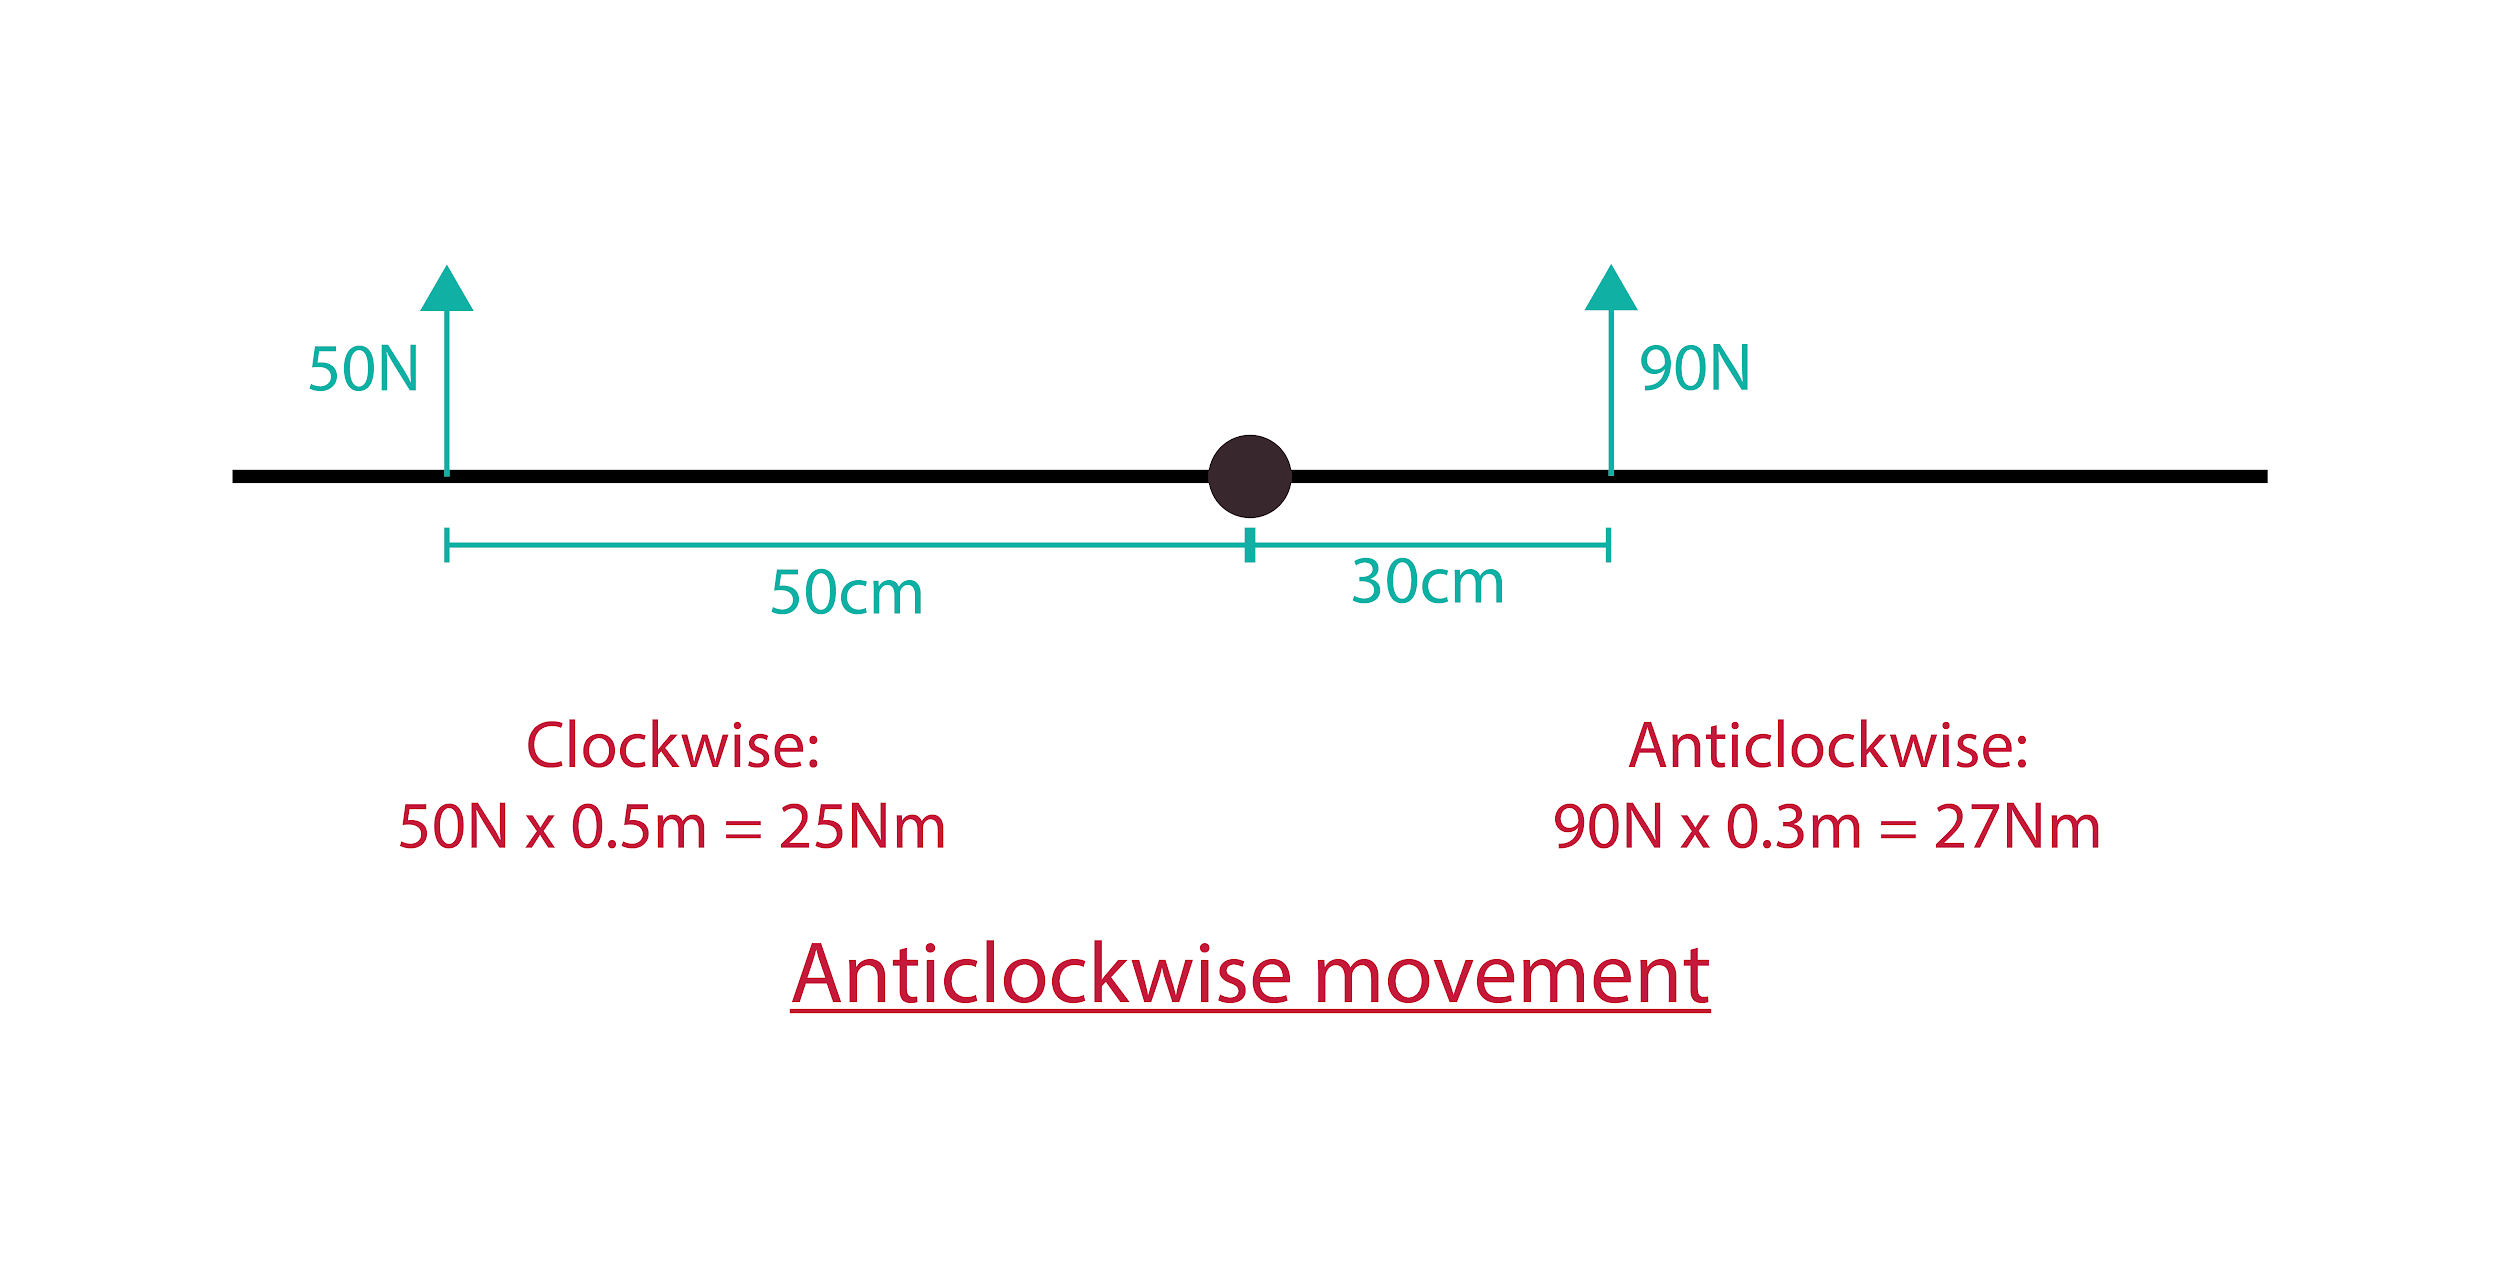
In conclusion, I want teachers of PE to consider the following questions:
✅ How can a knowledge of force, torque, vectors, net force or net torque help a performer improve their performance?
✅ What is the relationship between a knowledge of mechanics and a knowledge of anatomy?
✅ Assuming there is a relationship between mechanics and anatomy, why does the PE sector feel very comfortable teaching anatomy but far less so mechanics, in general?
✅ Can a working knowledge of mechanics support PE teachers in promoting physical literacy?
Thank you. Your comments are welcome. Please, also look out for part 2 of this post coming soon.
%20Text%20(Violet).png)
